Upgrading TSM – TSM v5.5 to v6.2.1.0
- TSMTechies

- Sep 22, 2015
- 2 min read
Updated: Oct 20, 2023
Audience: This document assumes understanding of TSM v5.5 implementation and administration and basic understanding of TSM v6.2 processes.
Note: This document assumes that all hardware/software requirements have already been evaluated.
Take the DB backup from TSM 5.5 server:

Back up configuration information:
Devconfig.out
Vohist.out

Copy dsmserv.opt and dsmserv.dsk from the server directory to another location:
Make copies of these files, which are located in the default directory for the Server: server options file, typically named dsmserv.opt dsmserv.dsk Optional: Make a copy of the accounting log file, dsmaccnt.log.
Halt the TSM 5.5 server:

Install the upgrade utilities:


Prepare the database of a V5 server for upgrade:
Running PREPARE DB command using Upgrade Tool, it will prepare the DB for upgrade.

Install TSM V6.2 in new machine:
Double click on TSM V6.2 server (CZ1N9ML.exe), it will extract the files.
Then double click on install.exe


Click on Next button and then accept the agreement and click on Next

Choose the path where would you like to install TSM Server

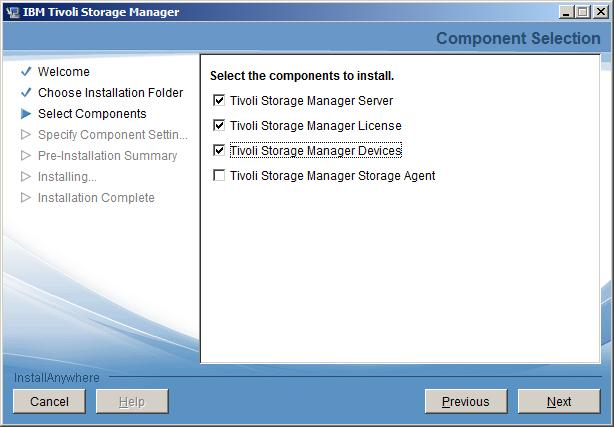
Select the components, which we need to install


It will shows the summary of components which are going to be install, check the list and click on Install.


Click on Continue Anyway.

Installation of TSM V6.2 completed successfully, click on Done.

Create the directories for the upgraded server instance:
Create the directories that the server instance needs for database and recovery logs.
Upgrade the server using the upgrade wizard by following the onscreen instructions.
Go to Server directory and double click on the upgrade utility, “dsmupgdx.exe”


Select the language to upgrade.

Click on Next

Note: As I am upgrading the TSM server to new machine, selected the second option.
Provide the details of the host name or IP-address and credentials of TSM server V5.5.

Click on next.

Click on next to prepare the database for the upgrade.

Select the server to upgrade.

Verify that the paths of the database and log files being upgraded are correct.


Click on next

Select upgrade method: here we are using Network method.

Click on next to configure the new server instance.

Click on next to begin the creation of the new server instance.

Give user ID and password of the system(new machine) where the database manager for this instance will run.

Specify the path for new instance.


Mention the size of Active log size and directory paths for Active Log, Archive Log, Active Log Mirror, and Failover Archive Log.

Check the configuration summary.

Configure instance completed with return code zero.

Click on next to insert the data into the new server instance.

Click next to begin the DB load process.

The data from the existing server has loaded (inserted) into the new database, with return code zero.

Click on done.

Check the Upgraded TSM SERVER version using > q status

Completing the upgrade by taking important first steps:
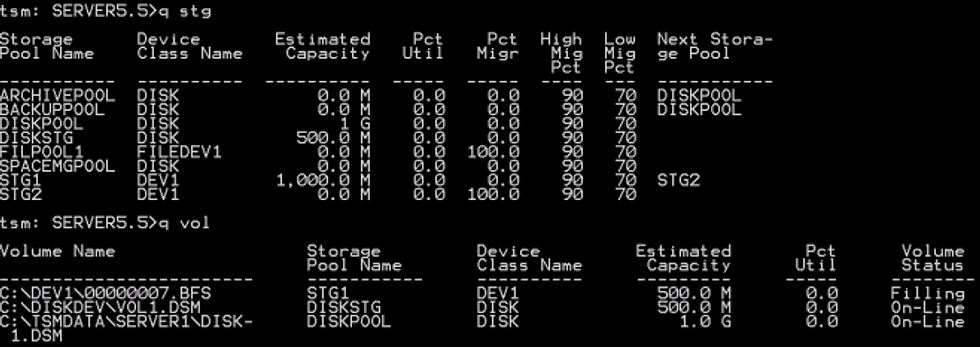
Verifying access to storage pools on disk

Registering licenses

Backing up the database after upgrading the server
After successfully upgrading the server, perform a full backup of its database. Before performing the backup, you must first select the device class for backups of the database.
Select the device class to be used for automatic backups of the database. Issue the following command from a IBM Tivoli Storage Manager administrative command line.
Syntax set dbrecovery device_class_name


Monitoring the upgraded server
when you upgraded the server in production environment, monitor the space used by the server to ensure that the amount of space is adequate. Make adjustments as needed.
*EoD


Comments